Sandpaper letters is one of the common materials in Montessori teaching. It is a useful way to teach children in learning the letters both in way of writing and reading the letters, through multi-sensory approach. The children will HEAR the sound of the letter, SEE the card of the letter, and FEEL the letter by tracing on it with their fingers.
In Montessori, letters are introduced in phonetic sounds instead of the “name” of the letter, example for: Letter C, it is introduced as “KA…”. There are proper ways of teaching sandpaper letters in Montessori approach, however I have not fully studying the approach and since Debo is still young, so I will just use part of the methods in teaching.
Purpose of using Sandpaper Letters:
- Used to teach children the correct way of writing and shapes of letters by tracing the sandpapers
- Identify and learn the sounds of the letters in graphic form
- Alphabets printouts – you may get free template here or if want to have my template can download it from my TPT store. For non-member, you need to sign up first before download it. Joining member is absolutely free, just click HERE to sign up.
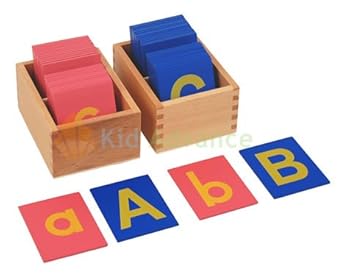
- Cardboard/ cardstock – remember in Montessori rule, Vowel in blue and consonant in red colour
- Sandpapers – I used about two pieces for one set of letters
Methods of doing it:
- Print out the templates
- I cut out the alphabets in rough way and put on the top of sandpaper, cut the alphabets nicely together. So, I have both sandpaper and colour paper alphabets together. Well, just thought that I can use the colour alphabets for later use, maybe in letter box or to decorate the lapbook.


3. Cut out the blue and red colour cardboard. I cut it into about 5.5 inch X 4 inch size.

4. Glue the sandpaper on the cardboard. Make sure you place at a standard position, so that each letters had the same position on the card. I used an used envelope to position the sandpaper by cutting the middle and right top part of the envelope, make it as L shape, then put the cardboard inside the envelope and glue the sandpaper on it.
I had make three sets: Capital Letters, Small Letters and Numbers. Here are the final products:


You can buy the ready products in some shops or online, but the price is a bit high. It is much cheaper (less than RM 10 for one set of letters) to make it yourself and not difficult to do it, just time consuming in cutting out the letters.
USL Education in Kajang and Subang Jaya selling at RM 190 online.

or Amazon at $34.99 (postage not included)
Hello! Thanks for putting up this tutorial. Of all the tutorials I've seen, I think yours the prettiest! May I have your alphabet and number templates please? Thanks so much. :)
ReplyDeleteGlad you like it.
DeleteYou can download the file from my TPT store for FREE.
If you still not yet a member, you must sign up in order to download the file. Join member is absolutely FREE and you may find other printouts FREE in TPT too. Click the link below to join member FREE:
https://www.teacherspayteachers.com/Signup/referral:chrisdephen
For already is member, please go to my store for the download:
http://www.teacherspayteachers.com/Store/Happy-Early-Learning
Cheers,
Chrisdephen
Hello Chris,
ReplyDeleteThank you so much for the alphabet templates. I have downloaded and will use it for my two kids. I am planning to make a process video of how I make the DIY sandpaper letters (I will use my cricut to cut the sandpaper, I will laminate the cardstock...etc). Can I use your alphabet templates? Credits will go to you for the alphabet template of course. Let me know, thank you so much.